
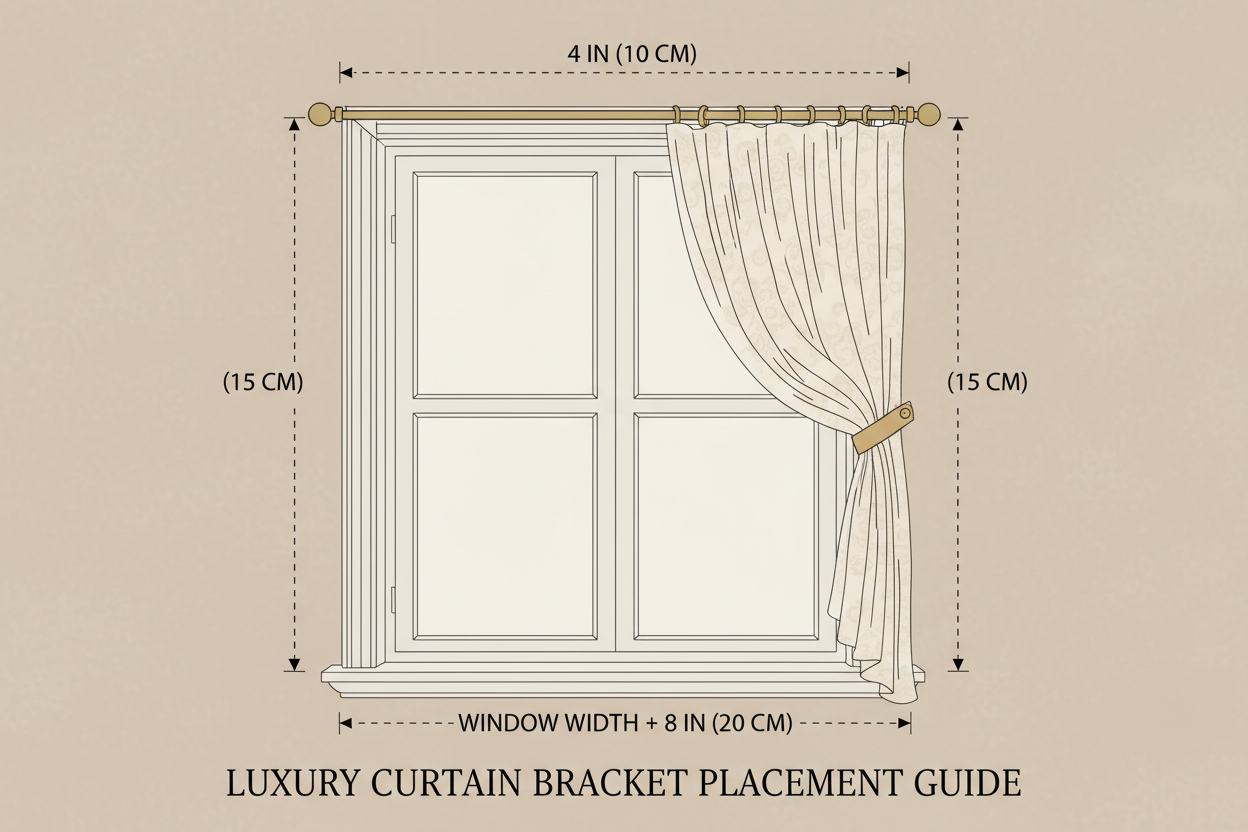
Why Bracket Placement Matters
Brackets are the foundation of your entire curtain installation. Place them correctly and your curtains will hang beautifully, open smoothly, and stay secure for years. Place them incorrectly and you'll face sagging rods, uneven drops, and curtains that block the window when open.
This guide covers everything you need to know about positioning your brackets for a professional result.
How Many Brackets Do You Need?
The number of brackets depends on the rod length:
- Up to 120cm: 2 brackets (one at each end)
- 120–200cm: 3 brackets (one at each end + one centre support)
- 200–300cm: 3–4 brackets
- Over 300cm: 4+ brackets, spaced no more than 100cm apart
For heavy curtains (velvet, interlined), always err on the side of more brackets. A sagging rod is both unsightly and a sign that the installation is under stress.
Where to Position the End Brackets
Height
The bracket height determines where your rod sits, which in turn determines the curtain drop. As a general guide:
- Mount brackets 10–15cm above the window frame for a classic, proportioned look
- Mount brackets 5–10cm below the ceiling for a dramatic, ceiling-height effect that makes rooms feel taller
- For very tall windows, splitting the difference and mounting at cornice height often works well
Whatever height you choose, both end brackets must be at exactly the same height. Use a spirit level and measure from the floor (not the ceiling, which may not be perfectly level) to confirm both marks are identical.
Width
The end brackets should be positioned so the rod extends 15–20cm beyond the window frame on each side — at minimum. This allows the curtains to stack clear of the glass when open, maximising light and making the window appear wider.
For wider curtains with more stack back, you may need to extend further. Refer to our Stack Back Guide to calculate the right extension for your curtains.
Centre Support Bracket Placement
For rods over 120cm, a centre support bracket prevents the rod from bowing under the weight of the curtains. Position it at the midpoint of the rod — or, for very long rods, space multiple support brackets evenly between the end brackets.
Important: The centre bracket must be at exactly the same height as the end brackets. Measure carefully and use a spirit level across all three points before drilling.
Bracket Projection
Bracket projection is the distance the bracket extends from the wall to the centre of the rod. This matters for two reasons:
- Clearance: The curtain must hang freely without rubbing against the wall, window frame, or any architrave. Allow at least 5cm of clearance between the back of the curtain and the wall.
- Layering: If you're hanging a double rod (sheer + main curtain), the front rod needs a longer projection than the back rod. Ensure both rods have enough clearance to operate independently.
Fixing Into the Right Surface
Brackets are only as strong as what they're fixed into. Always aim to fix into:
- Masonry (brick or concrete): Use appropriate masonry anchors. Very secure.
- Timber studs: Use wood screws directly into the stud. Very secure.
- Timber window frame or lintel: Often a good option above windows.
Avoid fixing into plasterboard alone for anything other than very lightweight curtains. If studs aren't in the right position, use heavy-duty hollow wall anchors rated for the load.
Checking Your Work Before Drilling
Before committing to any holes, do a dry run:
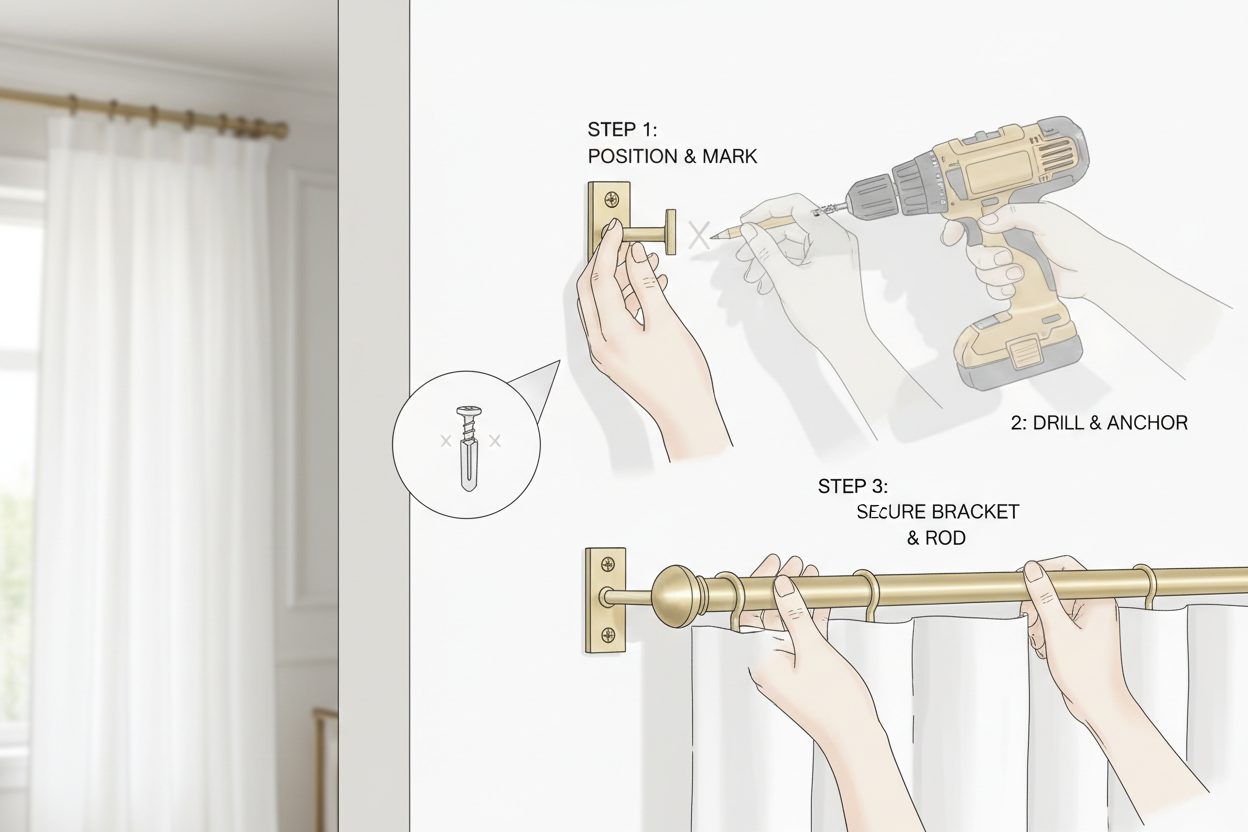
- Mark all bracket positions in pencil
- Hold a spirit level across all marks to confirm they're level
- Measure from the floor to each mark to double-check consistency
- Hold the rod up to the marks (with a helper if needed) to visualise the final result
- Check that the rod extension beyond the frame is equal on both sides
Taking five minutes to verify before drilling saves significant time and wall repair afterwards.
A Note on Architrave and Coving
If your window has a deep architrave (decorative moulding around the frame), you may need a bracket with a longer projection to clear it. Measure the depth of the architrave and add it to your required clearance when selecting brackets.
Similarly, if there is coving or a cornice near the ceiling, ensure the rod and finials will clear it when the rod is at your chosen height.

Leave a comment
This site is protected by hCaptcha and the hCaptcha Privacy Policy and Terms of Service apply.